

Welcome to the first blogpost of 2024, which I hope to be the first of many this year on photography, and tech.
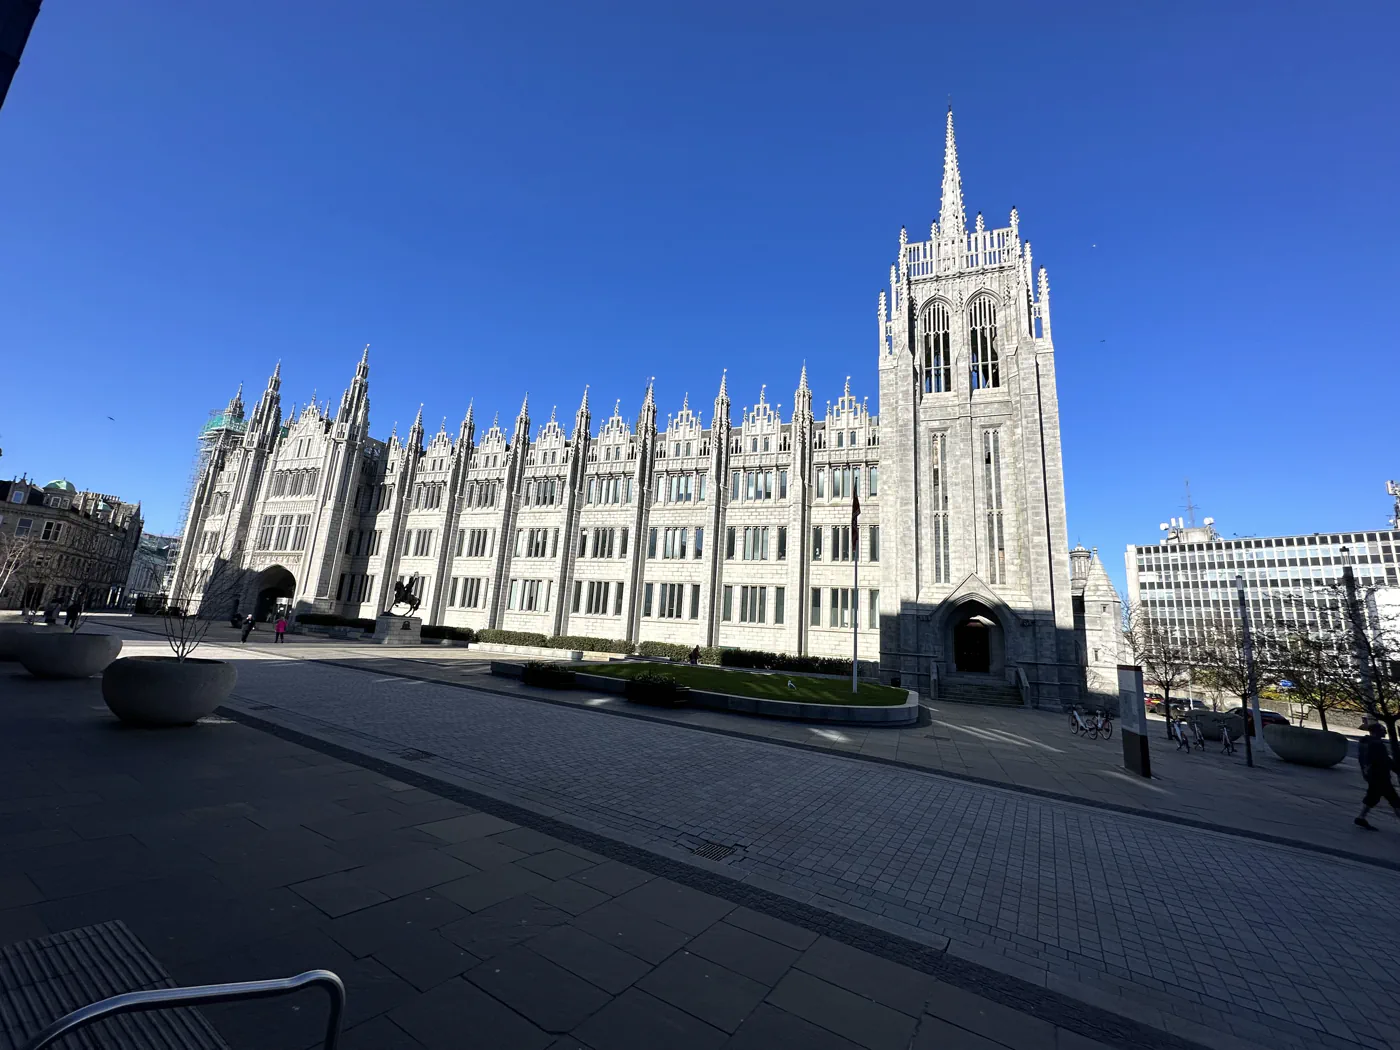
When taking a photo with an iPhone using the wide angle (.5), it’s a good idea to purposely leave a lot of extra space in the frame. This is because the wide angle lens has a tendency to distort images, making objects appear smaller or larger than they actually are. By leaving extra space, you can account for this distortion and make corrections in post-processing.
Additionally, leaving extra space also allows for more flexibility when it comes to cropping. You may find that a different composition would work better for your photo, or you may want to focus on a particular area of the image. Having extra space to work with gives you more options and allows you to make adjustments without sacrificing image quality.
It’s also worth noting that leaving extra space in the frame can help with the overall balance and composition of the photo. The extra space can give the eye room to move around and create a more visually interesting image.
Overall, intentionally leaving extra space when using the wide angle lens on an iPhone can be a smart move that pays off in post-processing and composition.
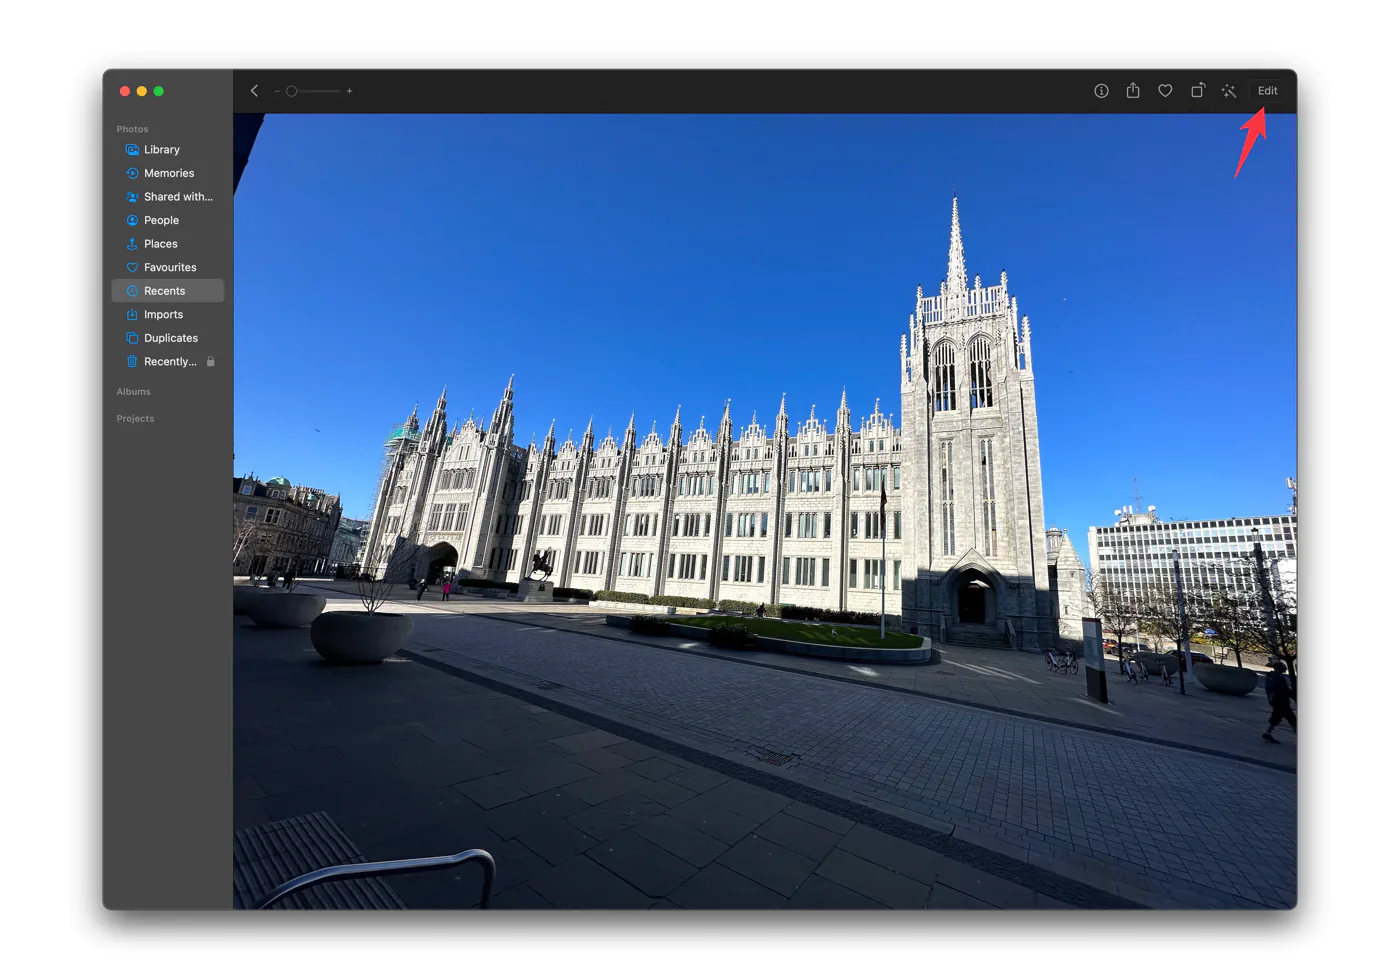
Here’s a short guide on how to crop and straighten photos in the Mac Photos app:
- Open the Mac Photos app and select the photo you want to edit.
- Click on the Edit button in the top right corner of the screen. This will open the editing tools.
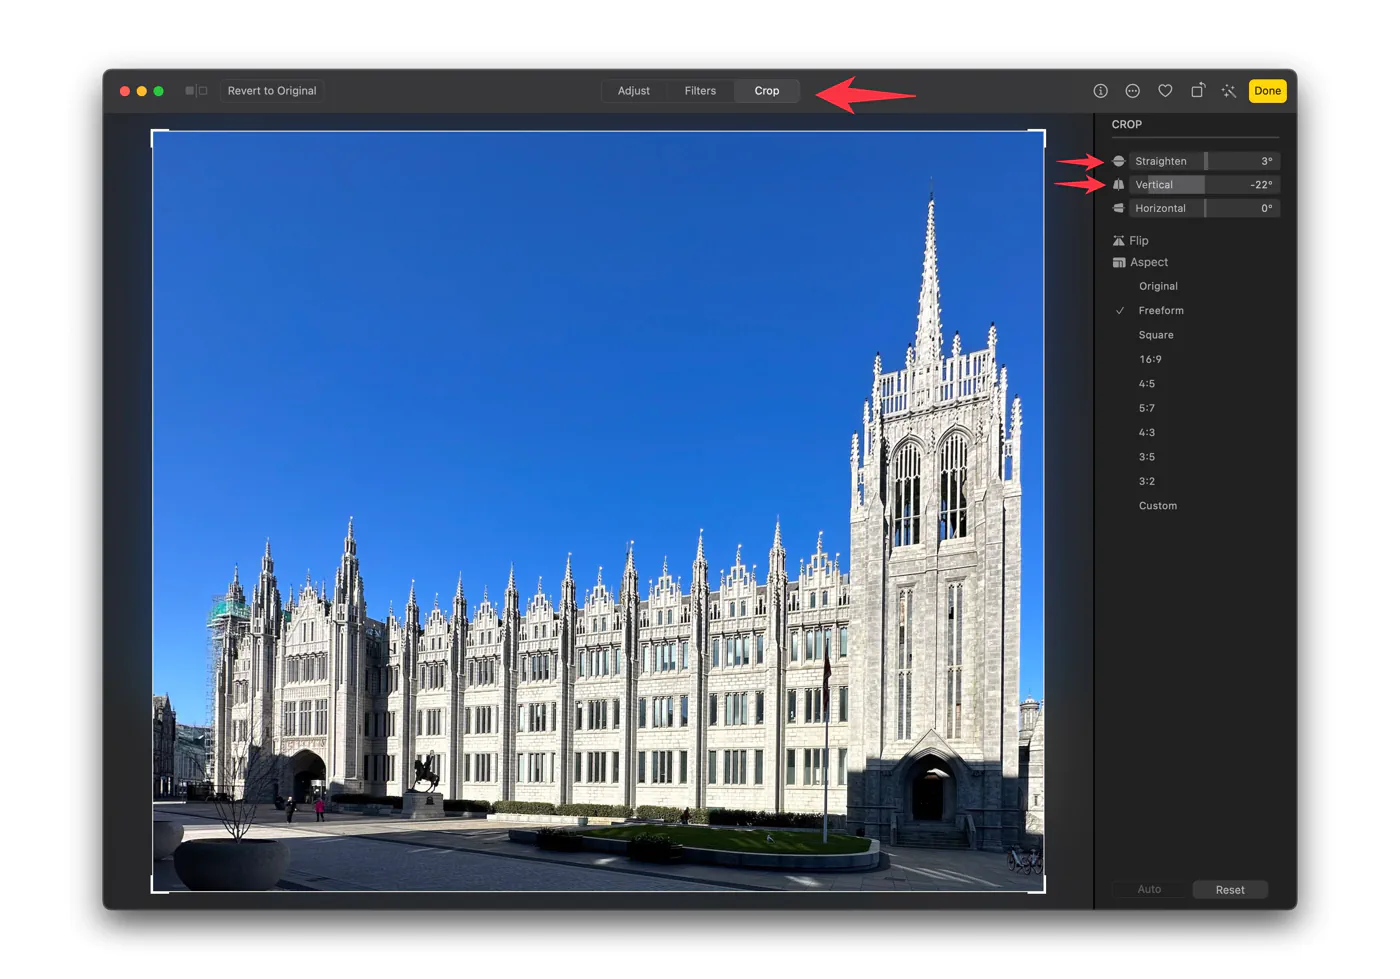
- To straighten the photo, click on the Crop button (it looks like a square with diagonal lines) and then click on the Straighten button (it looks like a level). Use your cursor to drag the dial left or right until the photo is straightened to your liking.
- To crop the photo, click on the Crop button again and then drag the corners of the crop box to adjust the size and shape of the crop. You can also click and drag within the crop box to reposition the crop.
- Once you’ve made your adjustments, click on the Done button in the top right corner of the screen to save your changes.
With these simple steps, you can easily crop and straighten your photos in the Mac Photos app.
Here’s a short guide on how to adjust photos in the Mac Photos app:
- Open the Mac Photos app and select the photo you want to edit.
- Click on the Edit button in the top right corner of the screen. This will open the editing tools.
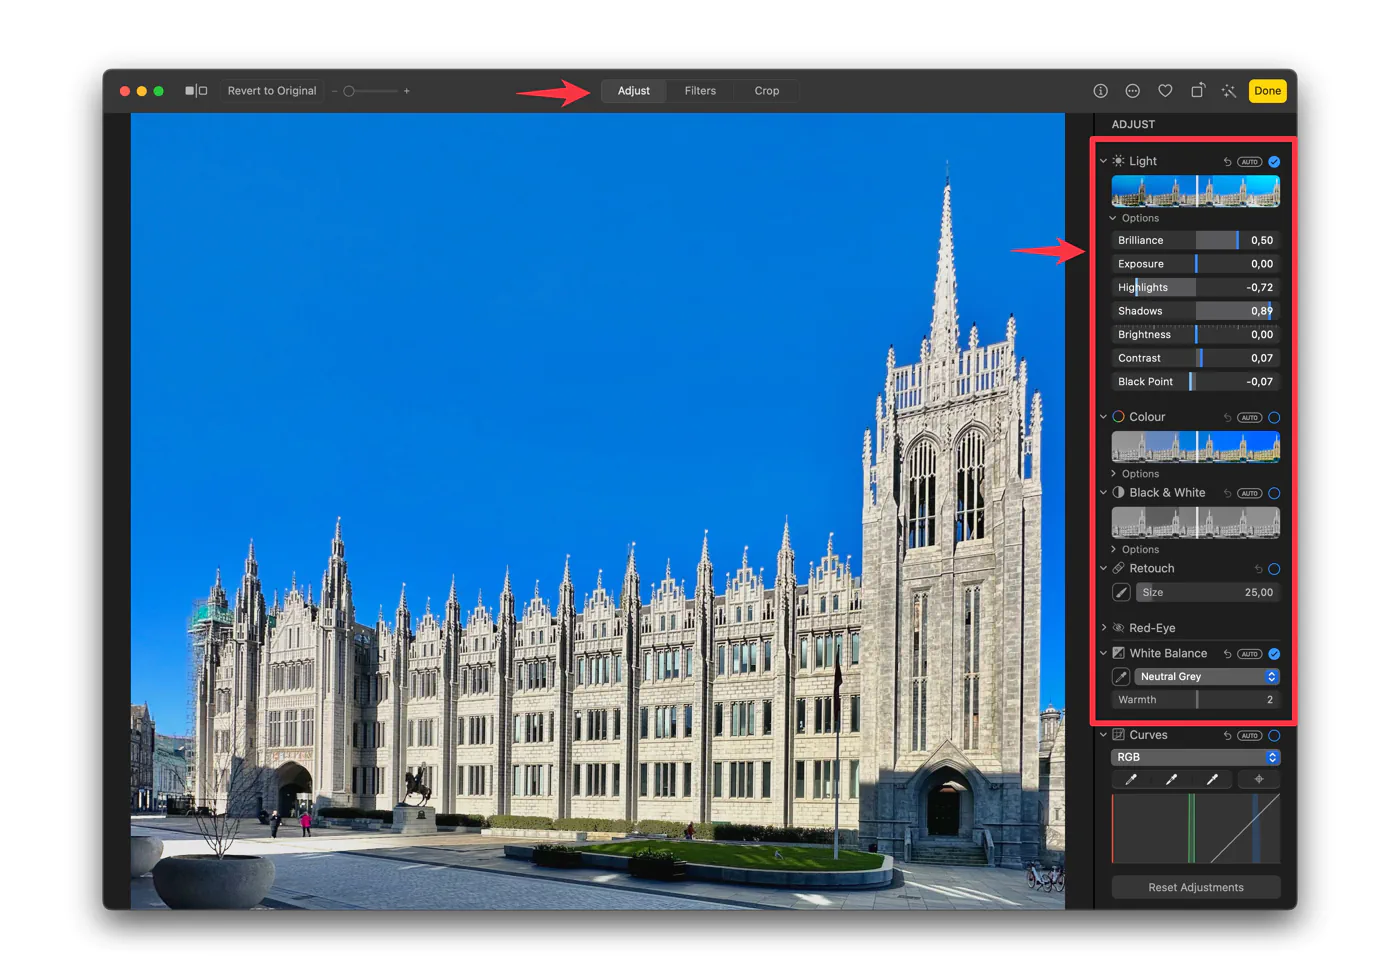
- Click on the Adjust button (it looks like a dial) to open the adjustment tools.
- Use the sliders to adjust the following parameters:– Light: Adjust the brightness, highlights, shadows, and contrast of the photo.
– Colour: Adjust the saturation, contrast, and cast of the photo.
– Black & White: Convert the photo to black and white and adjust the intensity of the effect.
– White Balance: Adjust the color temperature and tint of the photo.
– Curves: Adjust the tonal range of the photo using a curve tool.
- As you make adjustments, you can compare the edited version with the original version by clicking and holding the Compare button (it looks like two overlapping squares) at the top of the screen.
- Once you’ve made your adjustments, click on the Done button in the top right corner of the screen to save your changes.
With these simple steps, you can easily adjust the light, color, and other parameters of your photos in the Mac Photos app.
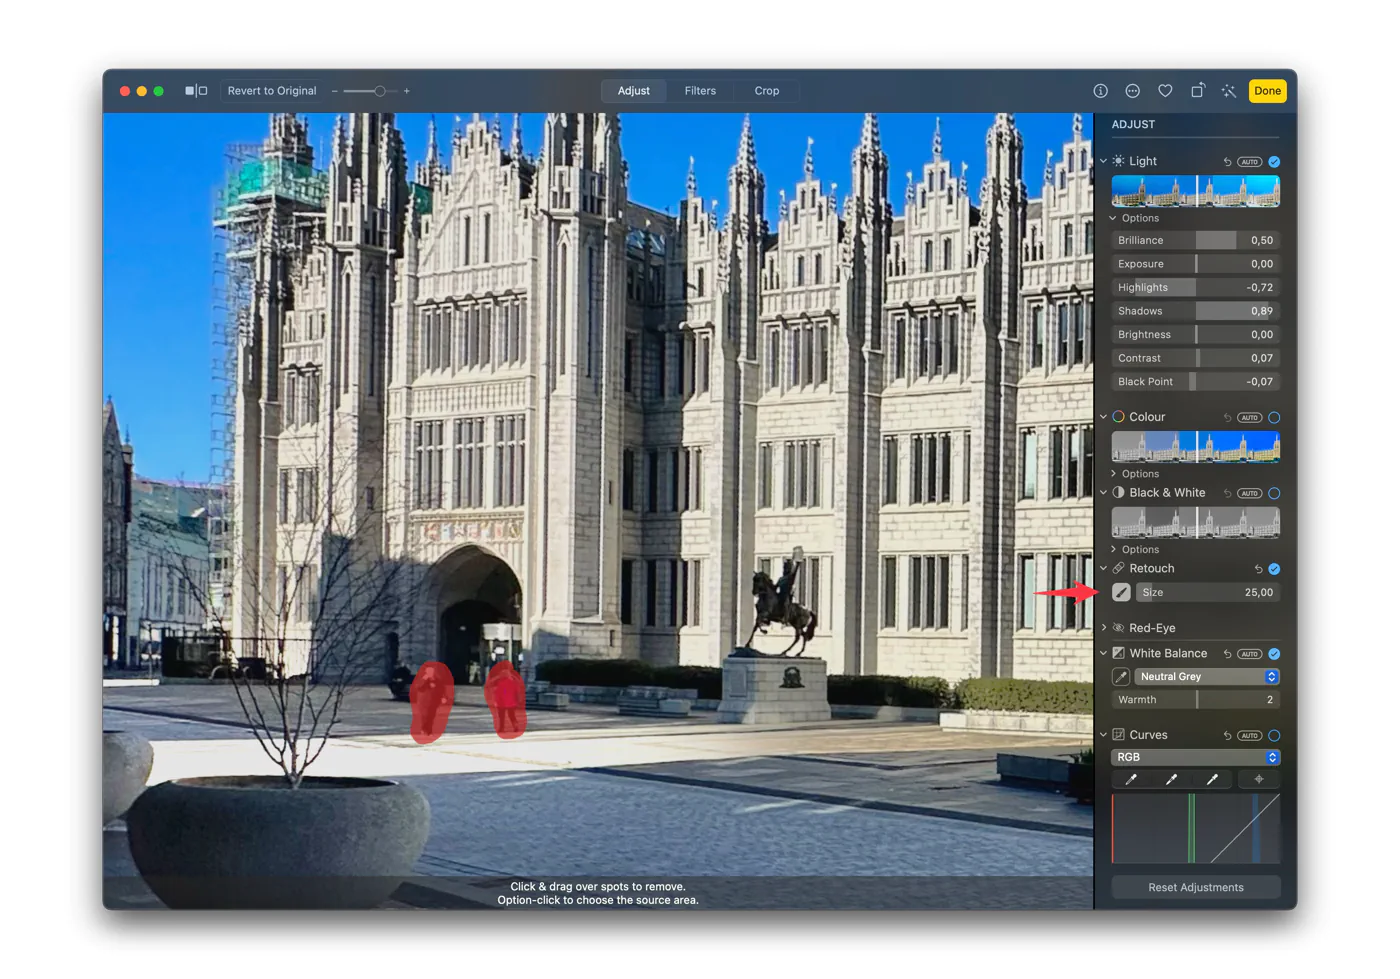
Here’s a short guide on how to remove people using the Touch or Retouch tool in the Mac Photos app:
- Open the Mac Photos app and select the photo that you want to edit.
- Click on the Edit button in the top right corner of the screen. This will open the editing tools.
- Click on the Retouch button (it looks like a band-aid) to open the Retouch tool.
- If you want to remove a person or object from the photo, choose the Touch option. Use your cursor to draw around the person or object that you want to remove. The Retouch tool will replace the selected area with surrounding pixels from the photo.
- If you want to remove blemishes or imperfections from a person’s skin, choose the Retouch option. Use your cursor to brush over the area that you want to retouch. The Retouch tool will blend the area with surrounding pixels from the photo.
- Adjust the brush size and strength using the sliders at the bottom of the screen.
- Once you’ve made your adjustments, click on the Done button in the top right corner of the screen to save your changes.
With these simple steps, you can easily remove people or objects and retouch blemishes from your photos using the Touch or Retouch tool in the Mac Photos app.
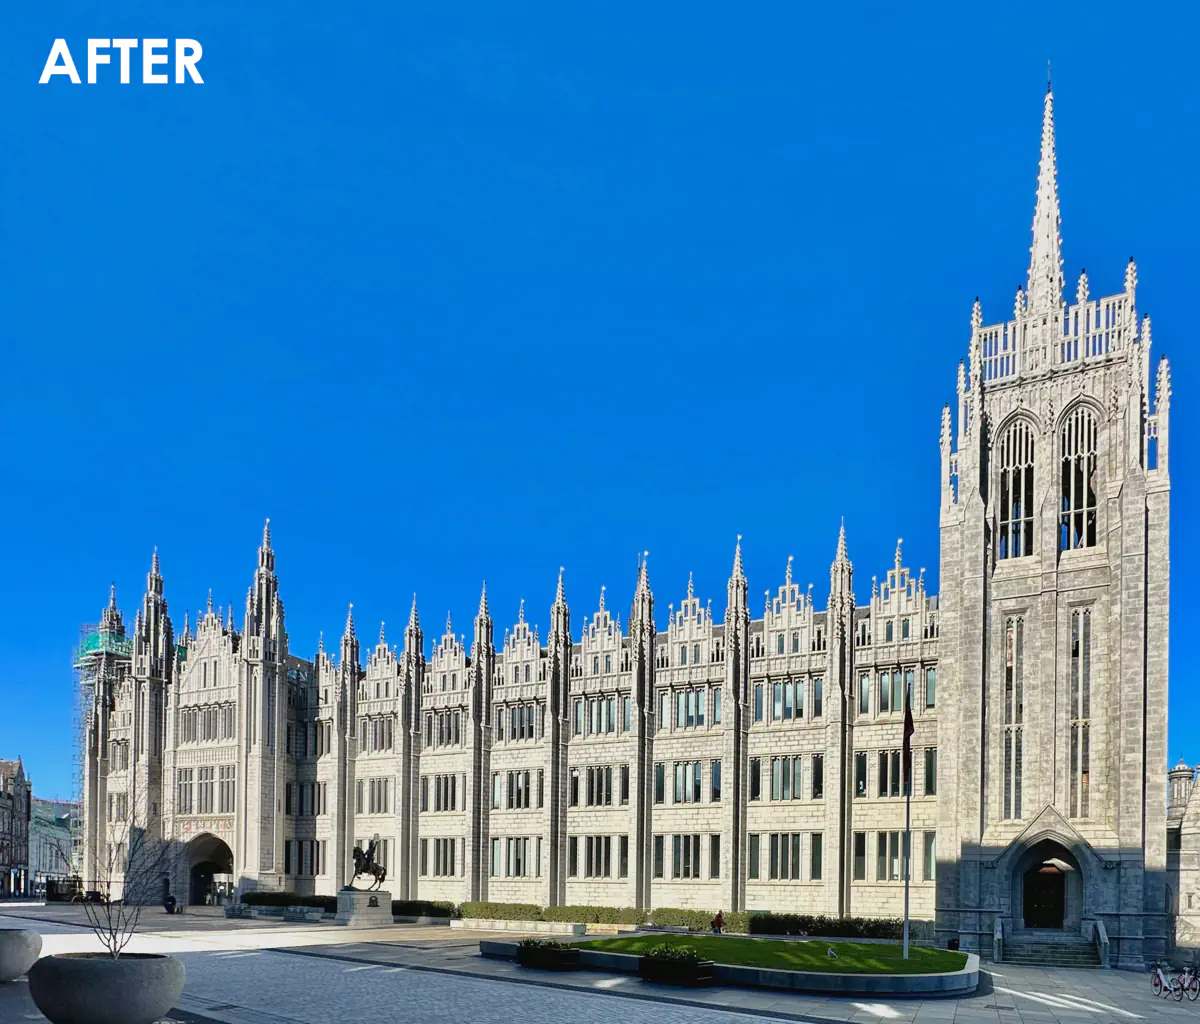
Final result

Before and after
Although the guide is about editing on a Mac, it is very similar on an iPhone, or iPad, and you can use TouchRetouch (from the App Store) to remove objects:


Subscribe To Our Newsletter
Join our mailing list to receive the latest news and promotions.
You have Successfully Subscribed!